*This post has been sponsored by Stikwood. All thoughts an opinions are my own.*
Today’s post is so exciting! My husband and I bought our home a little over a year ago. We have a list of projects and upgrades that we want to complete. We checked off our first project last weekend and I am so excited to share it with you guys!
The Project
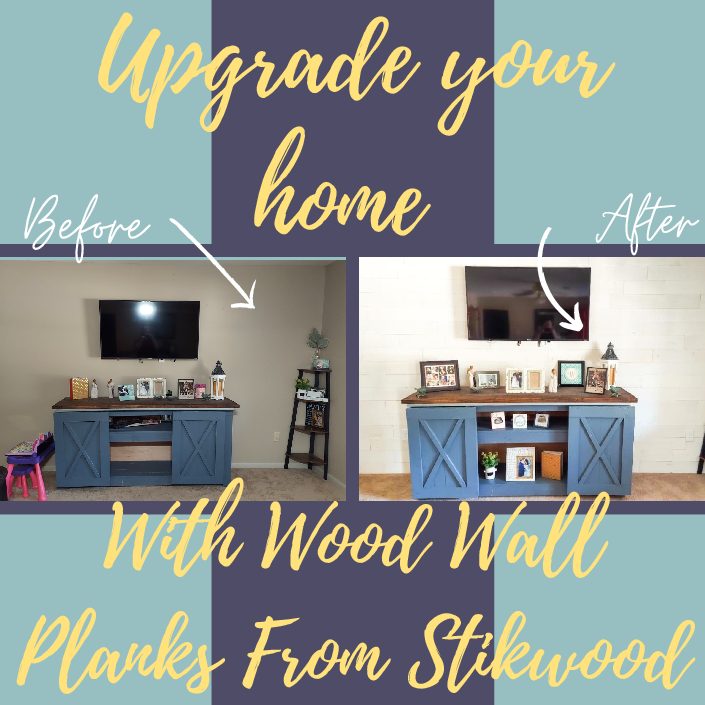
I partnered with Stikwood to transform one of our living room walls with their beautiful wood wall planks. My husband and I wanted a shiplap look for the wall behind our television. We also wanted the project to be as easy as possible. With two small children, it can be difficult to take on lengthy projects.
I discovered Stikwood on Instagram and immediately knew I wanted to give it a try! They were so generous to send us the materials we needed to complete our project.
About Stikwood
Stikwood is the world’s first Peel & Stik reclaimed wood and sustainable wood planking. Founded in 2012 by Jerry and Laura McCall, the company is the product of a deeply held belief that design can be both beautiful and resourceful.
Stikwood products include Peel and Stik wood planking and wall art ideal for the commercial and residential design markets. Made from reclaimed wood and sustainable woods sourced from various locations in the U.S., Stikwood products boast the natural beauty that only time and the forces of nature can provide. With its remarkably simple Peel and Stik installation process, Stikwood brings reclaimed wood planks within reach as a quick and easy interior design solution.

Our Materials
For our project, we chose the Hamptons reclaimed heartwood. It is a 5-inch-wide peel & stick shiplap wood made from reclaimed wood planks that are cut and textured by master artisans.
Its natural wood grain, creamy white color, and rippled texture of shiplap planks made it the perfect pick for our project! The wood wall planks come in random lengths that range from 1 foot to 4 feet in length.

The process
We started by wiping down our wall to make sure that it was nice & clean. Then, we opened the wood wall planks and sorted them by size. Next, we chose to begin at the top of the wall after ensuring that it was level. It is completely up to you how you want to stagger your wood wall planks. We made sure each plank was level as went along. We used a J-roller that came with our materials to roll over the planks to ensure they were all lying flat.


This project really was as simple as peeling off the backs of the wood wall planks and sticking them to your wall. At first, I was worried about how well the planks would stick to the wall, but I quickly discovered that that would not be an issue. My husband needed to re-adjust one of the planks and he bent one of his screwdrivers trying to peel it off the wall. Thankfully, that was our only mishap. It also made me very confident in wood wall planks‘ ability to stick to our wall and stay put.
The only areas that were a little tricky were fitting the planks around wall outlets. These were easily fitted by taking a few simple measurements and cutting the planks with a miter saw. We really did not have any issues with this project. It was super simple and we were able to get it all done in a few hours.
The Results
I am beyond pleased with how this project turned out. It looks so much better than I had imagined. Our wall looks bigger now and the beautiful color of the planks even brightens up the space. This is such an easy way to give your home a quick upgrade that you are sure to love!


We are so thankful to Stikwood for their partnership! If you want to see all of the beautiful wood wall planks that Stikwood has to offer, check out their website here: https://www.stikwood.com/ and their Instagram here: https://www.instagram.com/stikwooddesign/
Be sure to follow my Instagram to see my videos of the whole project: https://www.instagram.com/hummingbirdandhousewife/


Hey there! Would you mind if I share your blog with my facebook group? There’s a lot of folks that I think would really appreciate your content. Please let me know. Thanks
That is fine with me. Thanks!